Introduction
In this tutorial we will discuss the concept of Ports and how they work with IP addresses. If you have not read our article on IP addresses and need a brush up, you can find the article here. If you understand the concepts of IP addresses, then lets move on to TCP and UDP ports and how they work.
The devices and comptuers connected to the Internet use a protocol called TCP/IP to communicate with each other. When a computer in New York wants to send a piece of data to a computer in England, it must know the destination IP address that it woud like to send the information to. That information is sent most often via two methods, UDP and TCP.
The two Internet workhorses: UDP and TCP
UDP? TCP? I know you are getting confused, but I promise I will explain this in very basic terms so that you can understand this concept.
TCP stands for Transmission Control Protocol. Using this method, the computer sending the data connects directly to the computer it is sending the data it to, and stays connected for the duration of the transfer. With this method, the two computers can guarantee that the data has arrived safely and correctly, and then they disconnect the connection. This method of transferring data tends to be quicker and more reliable, but puts a higher load on the computer as it has to monitor the connection and the data going across it. A real life comparison to this method would be to pick up the phone and call a friend. You have a conversation and when it is over, you both hang up, releasing the connection.
UDP stands for User Datagram Protocol. Using this method, the computer sending the data packages the information into a nice little package and releases it into the network with the hopes that it will get to the right place. What this means is that UDP does not connect directly to the receiving computer like TCP does, but rather sends the data out and relies on the devices in between the sending computer and the receiving computer to get the data where it is supposed to go properly. This method of transmission does not provide any guarantee that the data you send will ever reach its destination. On the other hand, this method of transmission has a very low overhead and is therefore very popular to use for services that are not that important to work on the first try. A comparison you can use for this method is the plain old US Postal Service. You place your mail in the mailbox and hope the Postal Service will get it to the proper location. Most of the time they do, but sometimes it gets lost along the way.
Now that you understand what TCP and UDP are, we can start discussing TCP and UDP ports in detail. Lets move on to the next section where we can describe the concept of ports better.
TCP and UDP Ports
As you know every computer or device on the Internet must have a unique number assigned to it called the IP address. This IP address is used to recognize your particular computer out of the millions of other computers connected to the Internet. When information is sent over the Internet to your computer how does your computer accept that information? It accepts that information by using TCP or UDP ports.
An easy way to understand ports is to imagine your IP address is a cable box and the ports are the different channels on that cable box. The cable company knows how to send cable to your cable box based upon a unique serial number associated with that box (IP Address), and then you receive the individual shows on different channels (Ports).
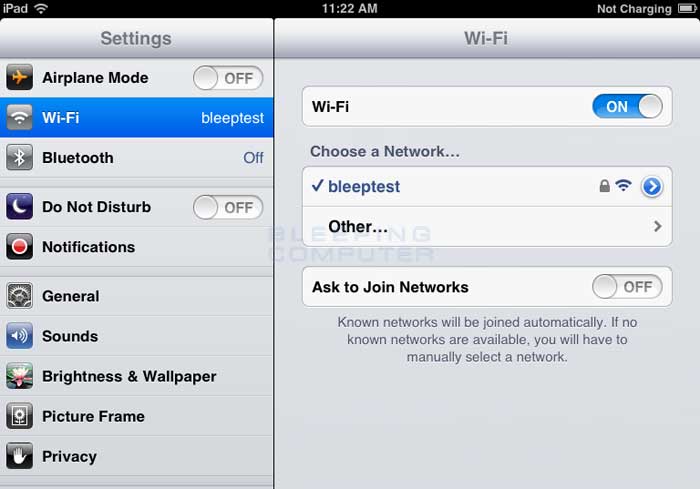
Ports work the same way. You have an IP address, and then many ports on that IP address. When I say many, I mean many. You can have a total of 65,535 TCP Ports and another 65,535 UDP ports. When a program on your computer sends or receives data over the Internet it sends that data to an ip address and a specific port on the remote computer, and receives the data on a usually random port on its own computer. If it uses the TCP protocol to send and receive the data then it will connect and bind itself to a TCP port. If it uses the UDP protocol to send and receive data, it will use a UDP port. Figure 1, below, is a represenation of an IP address split into its many TCP and UDP ports. Note that once an application binds itself to a particular port, that port can not be used by any other application. It is first come, first served.
Figure 1. IP address with Ports
In this tutorial we will discuss the concept of Ports and how they work with IP addresses. If you have not read our article on IP addresses and need a brush up, you can find the article here. If you understand the concepts of IP addresses, then lets move on to TCP and UDP ports and how they work.
The devices and comptuers connected to the Internet use a protocol called TCP/IP to communicate with each other. When a computer in New York wants to send a piece of data to a computer in England, it must know the destination IP address that it woud like to send the information to. That information is sent most often via two methods, UDP and TCP.
The two Internet workhorses: UDP and TCP
UDP? TCP? I know you are getting confused, but I promise I will explain this in very basic terms so that you can understand this concept.
TCP stands for Transmission Control Protocol. Using this method, the computer sending the data connects directly to the computer it is sending the data it to, and stays connected for the duration of the transfer. With this method, the two computers can guarantee that the data has arrived safely and correctly, and then they disconnect the connection. This method of transferring data tends to be quicker and more reliable, but puts a higher load on the computer as it has to monitor the connection and the data going across it. A real life comparison to this method would be to pick up the phone and call a friend. You have a conversation and when it is over, you both hang up, releasing the connection.
UDP stands for User Datagram Protocol. Using this method, the computer sending the data packages the information into a nice little package and releases it into the network with the hopes that it will get to the right place. What this means is that UDP does not connect directly to the receiving computer like TCP does, but rather sends the data out and relies on the devices in between the sending computer and the receiving computer to get the data where it is supposed to go properly. This method of transmission does not provide any guarantee that the data you send will ever reach its destination. On the other hand, this method of transmission has a very low overhead and is therefore very popular to use for services that are not that important to work on the first try. A comparison you can use for this method is the plain old US Postal Service. You place your mail in the mailbox and hope the Postal Service will get it to the proper location. Most of the time they do, but sometimes it gets lost along the way.
Now that you understand what TCP and UDP are, we can start discussing TCP and UDP ports in detail. Lets move on to the next section where we can describe the concept of ports better.
TCP and UDP Ports
As you know every computer or device on the Internet must have a unique number assigned to it called the IP address. This IP address is used to recognize your particular computer out of the millions of other computers connected to the Internet. When information is sent over the Internet to your computer how does your computer accept that information? It accepts that information by using TCP or UDP ports.
An easy way to understand ports is to imagine your IP address is a cable box and the ports are the different channels on that cable box. The cable company knows how to send cable to your cable box based upon a unique serial number associated with that box (IP Address), and then you receive the individual shows on different channels (Ports).
Ports work the same way. You have an IP address, and then many ports on that IP address. When I say many, I mean many. You can have a total of 65,535 TCP Ports and another 65,535 UDP ports. When a program on your computer sends or receives data over the Internet it sends that data to an ip address and a specific port on the remote computer, and receives the data on a usually random port on its own computer. If it uses the TCP protocol to send and receive the data then it will connect and bind itself to a TCP port. If it uses the UDP protocol to send and receive data, it will use a UDP port. Figure 1, below, is a represenation of an IP address split into its many TCP and UDP ports. Note that once an application binds itself to a particular port, that port can not be used by any other application. It is first come, first served.
<-------------------- 192.168.1.10 -------------------->
| 0 | 1 | 2 | 3 | 4 | 5 | .. | .. | .. | .. | .. | .. | .. | .. | 65531 | 65532 | 65533 | 65534 | 65535 |
This all probably still feels confusing to you, and there is nothing
wrong with that, as this is a complicated concept to grasp. Therefore, I
will give you an example of how this works in real life so you can have
a better understanding. We will use web servers in our example as you
all know that a web server is a computer running an application that
allows other computers to connect to it and retrieve the web pages
stored there.
In order for a web server to accept connections from remote computers,
such as yourself, it must bind the web server application to a local
port. It will then use this port to listen for and accept connections
from remote computers. Web servers typically bind to the TCP port 80,
which is what the http protocol uses by default, and then will wait and
listen for connections from remote devices. Once a device is connected,
it will send the requested web pages to the remote device, and when done
disconnect the connection.
On the other hand, if you are the remote user connecting to a web
server it would work in reverse. Your web browser would pick a random
TCP port from a certain range of port numbers, and attempt to connect to
port 80 on the IP address of the web server. When the connection is
established, the web browser will send the request for a particular web
page and receive it from the web server. Then both computers will
disconnect the connection.
Now, what if you wanted to run an FTP server, which is a server that
allows you to transfer and receive files from remote computers, on the
same web server. FTP servers use TCP ports 20 and 21 to send and receive
information, so you won't have any conflicts with the web server
running on TCP port 80. Therefore, the FTP server application when it
starts will bind itself to TCP ports 20 and 21, and wait for connections
in order to send and receive data.
Most major applications have a specific port that they listen on and
they register this information with an organization called IANA. You can
see a list of applications and the ports they use at the IANA Registry.
With developers registering the ports their applications use with IANA,
the chances of two programs attempting to use the same port, and
therefore causing a conflict, will be diminished.
Thanks & Regards,
"Remember Me When You Raise Your Hand For Dua"
Raheel Ahmed Khan
System Engineer
send2raheel@yahoo.com
send2raheel@engineer.com
sirraheel@gmail.com
send2raheel (skype id)
My Blog Spot
http://raheel-mydreamz.blogspot.com/
http://raheeldreamz.wordpress.com/
My Face book pages
http://www.facebook.com/pages/My-Dreamz-Rebiuld-our-nation
http://www.facebook.com/pages/Beauty-of-islam
http://www.facebook.com/pages/Health-is-wealth


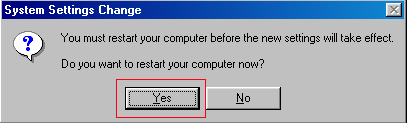
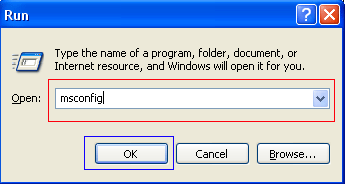
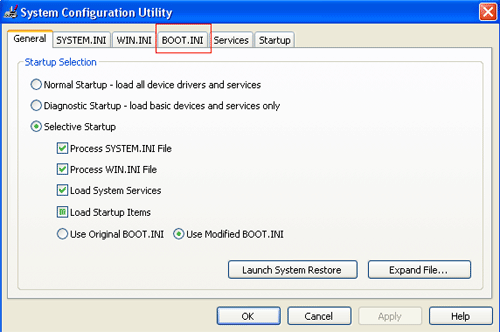
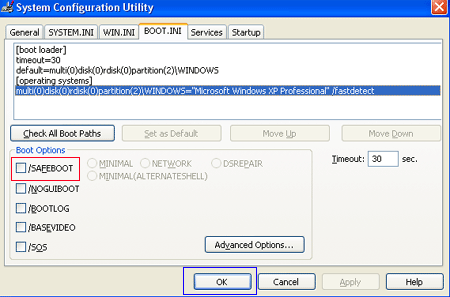
 ) button.