Tuesday, 16 December 2014

10 Things You Didn't Know Your iPhone Could Do


1. Take Siri to School


Tired of Siri pronouncing things wrong? Next time she screws something up, tell her "That's not how you pronounce X," and then pronounce it for her. She'll give it another try, and offer you a few options for how she now thinks she's supposed to pronounce the word. Pick the one that sounds the best, and Siri will use that pronunciation from now on. 


2. Level Up


Need a level for a quick DIY project at home? The compass app on your iPhone has one built in. To use it, open up the compass app on your phone, and then swipe to the left to pull up the level screen. 


3. Give Better Vibrations


You're not limited to the same vibration for everything. Go into the Settings of your phone and then select Sounds, Vibration, and then Create New Vibration to tap out your own buzzing pattern. You can name your creation and then use it as a vibration alert for anything you'd like. For instance, you could have one vibration pattern to signal that you've received a text and another for tweets or emails. Once you've implemented your own secret code, you won't need to pull your phone out of your pocket nearly as much. 


4. Control Your Camera With Your Headphones


Arms not quite long enough to get the whole family into that selfie? Use your earbuds as a remote shutter button for your iPhone's camera. Simply launch the camera as normal, set up your shot, and then press the volume-up button to snap a photo. 


5. Block Unwanted Calls


Tired of constant calls from a persistent telemarketer? Block calls from a specific number by clicking the "i" button beside their most recent call or pulling up their contact card in your phone, and selecting Block This Caller from the bottom of the page. 

Once blocked, you will no longer see texts or calls from that person. If you make up later on, you can unblock their number by going to Settings, Phone, and then Blocked, and removing them from your list. 


6. Put a Sleep Timer on Your Music


Like to listen to tunes while you're going to sleep? You can use the timer on your iPhone to schedule when your music will stop so that it cuts out soon after you fall asleep. Go to the clock feature on your phone and select Timer. Choose how long you'd like music to play as the length of the timer, and then select When Timer Ends from the page. Next, scroll to the bottom of the list of available alarm sounds and then select Stop Playing from the options. Finally, hit Start on the timer, now your tunes will stop playing when the time hits zero. 


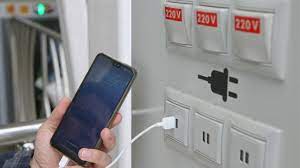
7. Power Up Faster


Have only a few minutes to charge your phone before heading out? Put it in airplane mode to make it power up twice as fast. Since your phone won't have to use any juice to search for and connect to a wireless tower or a Wi-Fi network, it can concentrate on getting charged up. (Airplane mode is also a great way to stretch that last 5 percent of battery life.) 


8. Show the Time Stamp of Every Text


Struggling to remember exactly when you sent that last text (and if it's too soon to send another one)? Slide a single text to the left to reveal the time stamp on all of the texts on the page. 


9. Go Undercover


Don't want anyone to see when your significant other suddenly decides to send you a saucy text? You can disable the home screen preview for messages so that any nosy screen-lookers see only "iMessage" rather than details about your scandalous after-dinner plans. Disable preview by going to Settings, Notification Center, and then Messages. In the Messages page, toggle the Show Preview button to the off position. 

While you're poking around, you might also want to toggle off the Send Read Receipts feature. Turning it off means that people who send you iMessages will only be able to tell a message has been delivered, not whether or not you've read it. You can get to it by going back to your main Settings page and selecting Messages. 


10. Remind Yourself to Buy Toilet Paper


The iPhone will allow you to create a geofence around a particular location, and send you a reminder whenever you pass through its virtual gates. For instance, a fence around your local grocery store can remind you to pick up some TP while you shop, or a fence at the office can be the nudge you need to remember to pass along that project file you keep forgetting. Set up a geofence by going into your phone's Reminders app, create a reminder, and then tap the "i" beside it. Select "Remind me at a location" from the next page, and then add the address where you'd like to receive a notification and whether you'd like to get it as you're arriving at the place, or as you're about to leave. 

Thanks & Regards,

"Remember Me When You Raise Your Hand For Dua"
Raheel Ahmed Khan
System Engineer
send2raheel@yahoo.com
send2raheel@engineer.com
sirraheel@gmail.com
send2raheel (skype id)

My Blog Spot 
http://raheel-mydreamz.blogspot.com/

How to Study in Six Simple Steps


How to Study in Six Simple Steps

Developing good study skills is critically important. You spend so much of childhood learning stuff, and being tested and quizzed and evaluated on what you've learned. Because of this, one of the most important subjects in education should be how to study, but it’s rarely taught. How well you study can make a huge difference in your success, so it’s worth spending a little time getting the principles right.

Follow these six simple steps and you’ll find it much easier to study — and you’ll retain much more information, making the whole process less onerous. You might even come to enjoy studying!

1) Space
Make room, mentally and physically, for studying. Usually you’re studying for something specific, such as an exam. This can seem daunting, like a mountain to climb. If this sounds familiar, take a deep breath and pause for a moment before you start.

Think of how you make yourself comfortable when you do something you really enjoy, like watching a favorite television program. How do you settle in for the show? Do you sprawl or curl up? Do you have favourite relaxing clothes? Do you choose a particular drink or something to nibble? Borrow all these favorite things to make your studying a better experience. If you’re in a good space physically, you can improve your mental space.

2) Place
Create your own personal work zone. It doesn’t have to look like a work-space — that’s what many students find off-putting. Building on what you did in the previous paragraph, make the place your own and somewhere you enjoy.

3) Pace
Find the right pace for your work. Sprinters work hard and fast in a burst of energy while marathon runners spread the load and build slowly towards the climax. There’s no right or wrong way to pace your studying, except what works for you. Notice the way you like to work, and adjust your pace accordingly. (Just remember, if you study at a slow pace, you'll need to set aside more time for the task.)

Whether you have bags of time or a brief study period, remember that breaks are just as important as active study (10 minutes off for every 30 minutes of study works for many people), and use those breaks to reward yourself with a small treat.

4) Memory
It helps to know how your memory works. Here is the key to memory: in any sequence, people remember the first and last things best. Whatever you try to remember, you’ll find yourself recalling the beginning and the end, with less clear memories of the middle. You can’t change this — it’s wired in, it's how our brains work — so don’t fight it. Instead, use this fact to your advantage by organizing your study so the most important bits are at the beginning and end of your sessions.

5) Method
It’s always good to have a plan. However big or complex your task may look at first sight, with a feasible plan you can always find a way to manage it.

When studying, break your biggest goal into smaller chunks or tasks. It’s best if each of these chunks consists of a single topic. Often, you’ll discover one or two key elements that stand out and get fixed in your mind. You can then use those as building blocks.

Classic tricks used by memory professionals include ‘the house of memory’ where you place everything you want to remember in unique locations in the house. It’s also useful to use humor — play with your key-words and make them funny or outrageous. You’ll be surprised at how much easier they are to memorize.

Mind maps
A mind map is rough diagram that you can make to visually outline information. You can create a mind map by starting with the primary word or phrase of a topic in the center, with related, lesser categories branching out from it. Subcategories of these are on smaller branches, still. Your categories can consist of anything you think is important; they can be important terms, ideas, or tasks to complete — whatever you need to help you study or organize the information.

Mind maps are easy to master if you don’t use them already, and you’ll discover they help you remember masses of information much more efficiently than conventional lists. If you're not satisfied with your current note-taking skills, try building a mind map during your next class or lecture and see if you find it more helpful.

Above all, remember there should be no pressure when you are studying. Approach studying the right way and you'll remember the important stuff. Make studying fun and you'll find that learning can be enjoyable.

Thanks & Regards,

"Remember Me When You Raise Your Hand For Dua"
Raheel Ahmed Khan
System Engineer
send2raheel@yahoo.com
send2raheel@engineer.com
sirraheel@gmail.com
send2raheel (skype id)

My Blog Spot
http://raheel-mydreamz.blogspot.com/

Saturday, 1 November 2014

How to Partition Your Hard Drive in Windows 7

Disk partitioning is to divide the hard drive into multiple logical units. People don’t often choose to partition their hard disks, but it has many benefits. Mainly, by partitioning your disk, you can separate your operating system from your data and thus reduce the chances of your data becoming corrupted.


  1. Partition Your Hard Drive in Windows 7 Step 1.jpg

    1
    Open the Computer Management tool. Open the Start menu. Type “Computer Management” in the search bar of the Start menu and press enter.
    Ad
  2. Partition Your Hard Drive in Windows 7 Step 2.jpg

    2
    Select the Disk Management tool. Click on Disk Management on the left side of the window and you should see all of the disks and their partitions on your computer.
    • In the example in the picture, there is 1 disk with two partitions.
  3. Partition Your Hard Drive in Windows 7 Step 3.jpg

    3
    Make some space for the new partition. Right-click on the partition you wish to re-size and select the Shrink Volume option.
    • In the example in the picture the (C:) drive is used.
    • Note: There may be a partition named System Reserved. It is not recommended that you alter this partition at all.
  4. Partition Your Hard Drive in Windows 7 Step 4.jpg

    4
    Shrink the drive. Enter the size you wish to shrink your drive to in megabytes (1000 MB = 1GB). Then click on the Shrink button.
    • In this example the drive is shrunk by 10000 MB or 10 GB.
    • Note: You cannot shrink your volume greater than the amount indicated in theSize of available shrink space in MB section.
  5. Partition Your Hard Drive in Windows 7 Step 5.jpg

    5
    Create a new volume. You should now see a new unallocated partition in yourDisk Management window. Right-click on the Unallocated partition and select theNew Simple Volume option.
  6. Partition Your Hard Drive in Windows 7 Step 6.jpg

    6
    The New Simple Volume Wizard. The New Simple Volume Wizard should popup. Click on the Next button to continue.
  7. Partition Your Hard Drive in Windows 7 Step 7.jpg

    7
    Enter size of new partition. Enter the amount of memory you wish to allocate for your new partition and click on the Next button.
    • In the example in the picture, the maximum memory available is allocated to the new volume.
    • Note: You cannot make your new volume larger than the maximum amount of memory available.
  8. Partition Your Hard Drive in Windows 7 Step 8.jpg

    8
    Give the new volume a letter name or path. Select from the menu, a letter name for your new partition and click on the “Next” button.
    • The letter name chosen for the example in the picture is (E:)
    • The letter name or path is used by Windows to identify and navigate to your new volume.
  9. Partition Your Hard Drive in Windows 7 Step 9.jpg

    9
    Settings for the new volume.
    • Click on the Format this volume with the following settings:
    • For File System, select NTFS
    • For Allocation unit size, select Default
    • For Volume Label, type the name you wish to give your new drive.
    • Click on the Perform a quick format
    • Then click on the Next button
  10. Partition Your Hard Drive in Windows 7 Step 10.jpg

    10
    Create the new volume. Look over your settings and click on the Finishbutton.
  11. Partition Your Hard Drive in Windows 7 Step 11Bullet1.jpg

    11
    Format the new volume.
    • You will get a popup asking you to partition your new drive. Click on the Format disk button.
    • A new window will popup. Keep the settings and click on the Start button.
      Partition Your Hard Drive in Windows 7 Step 11Bullet2.jpg
    • A warning will popup. Click on the OK button.
      Partition Your Hard Drive in Windows 7 Step 11Bullet3.jpg
  12. Partition Your Hard Drive in Windows 7 Step 12.jpg

    12
    Check new volume. If everything was done correctly, you should now see your new drive in the Disk Management window.

Wednesday, 29 October 2014

How To Install Windows 7 (Step-By-Step Tutorial With Screenshots)


Load in your Windows 7 DVD and boot it. It will now load the setup files.

Select your language, time & currency format, keyboard or input method and click Next.
Click Install now.
Check I accept the license terms and click Next.
Click Upgrade if you already have a previous Windows version or Custom (advanced) if you don't have a previous Windows version or want to install a fresh copy of Windows 7.
(Skip this step if you chose Upgrade and have only one partition) Select the drive where you want to install Windows 7 and click Next. If you want to make any partitions, click Drive options (advanced), make the partitions and then click Next.
It will now start installing Windows 7. The first step, (i.e. Copying Windows files) was already done when you booted the Windows 7 DVD so it will complete instantly.
After completing the first step, it will expand (decompress) the files that it had copied.
The third and fourth step will also complete instantly like the first step.
After that it will automatically restart after 15 seconds and continue the setup. You can also click Restart now to restart without any delays.
After restarting for the first time, it will continue the setup. This is the last step so it will take the most time than the previous steps.
It will now automatically restart again and continue the setup. You can click Restart now to restart without any delays.
Type your desired user name in the text-box and click Next. It will automatically fill up the computer name.
If you want to set a password, type it in the text-boxes and click Next.
Type your product key in the text-box and click Next. You can also skip this step and simply click Next if you want to type the product key later. Windows will run only for 30 days if you do that.
Select your desired option for Windows Updates.
Select your time and click Next.
If you are connected to any network, it will ask you to set the network's location.
And there you have a fresh copy of Windows 7 installed!

Thanks & Regards,
"Remember Me When You Raise Your Hand For Dua"Raheel Ahmed KhanSystem Engineersend2raheel@yahoo.comsend2raheel@engineer.comsirraheel@gmail.comsend2raheel (skype id)
My Blog Spot http://raheel-mydreamz.blogspot.com


Saturday, 25 October 2014

Did you know..??


Did you know..??

* VIRUS - Vital Information Resource UnderSeized.
* 3G -3rd Generation.
* GSM - Global System for Mobile Communication.
* CDMA - Code Divison Multiple Access.
* UMTS - Universal MobileTelecommunication System.
* SIM - Subscriber Identity Module .
* AVI = Audio Video Interleave
* RTS = Real Time Streaming
* SIS = Symbian OS Installer File
* AMR = Adaptive Multi-Rate Codec
* JAD = Java Application Descriptor
* JAR = Java Archive
* JAD = Java Application Descriptor
* 3GPP = 3rd Generation Partnership Project
* 3GP = 3rd Generation Project
* MP3 = MPEG player lll
* MP4 = MPEG-4 video file
*AAC = Advanced Audio Coding
* GIF= Graphic Interchangeable Format
* JPEG = Joint Photographic Expert Group
* BMP = Bitmap
* SWF = Shock Wave Flash
* WMV = Windows Media Video
* WMA = Windows Media Audio
* WAV = Waveform Audio
* PNG = Portable Network Graphics
* DOC = Document (MicrosoftCorporation)
* PDF = Portable Document Format
* M3G = Mobile 3D Graphics
* M4A = MPEG-4 Audio File
* NTH = Nokia Theme (series 40)
* THM = Themes (Sony Ericsson)
* MMF = Synthetic Music Mobile Application File
* NRT = Nokia Ringtone
* XMF = Extensible Music File
* WBMP = Wireless Bitmap Image
* DVX = DivX Video
* HTML = Hyper Text Markup Language
* WML = Wireless Markup Language
* CD -Compact Disk.
* DVD - Digital Versatile Disk.
*CRT - Cathode Ray Tube.
* DAT - Digital Audio Tape.
* DOS - Disk Operating System.
* GUI -Graphical User Interface.
* HTTP - Hyper Text Transfer Protocol.
* IP - Internet Protocol.
* ISP - Internet Service Provider.
* TCP - Transmission Control Protocol.
* UPS - Uninterruptible Power Supply.
* HSDPA - High Speed Downlink PacketAccess.
* EDGE - Enhanced Data Rate for GSM[GlobalSystem for Mobile Communication] Evolution.
* VHF - Very High Frequency.
* UHF - Ultra High Frequency.
* GPRS - General PacketRadio Service.
* WAP - Wireless ApplicationProtocol.
* TCP - Transmission ControlProtocol .
* ARPANET - Advanced Research Project Agency Network.
* IBM - International Business Machines.
* HP - Hewlett Packard.
*AM/FM - Amplitude/ Frequency Modulation.
* WLAN - Wireless Local Area Network

Must Share with others


Thanks & Regards,

"Remember Me When You Raise Your Hand For Dua"
Raheel Ahmed Khan
System Engineer
send2raheel@yahoo.com
send2raheel@engineer.com
sirraheel@gmail.com
send2raheel (skype id)

My Blog Spot 
http://raheel-mydreamz.blogspot.com/


what is Juice Jacking SCAM

  Juice Jacking is a cybersecurity threat that occurs when cybercriminals manipulate public charging stations, such as USB charging ports in...