Thursday, 20 September 2012

How to see hidden files in Windows

Introduction
By default Windows hides certain files from being seen with Windows Explorer or My Computer. This is done to protect these files, which are usually system files, from accidentally being modified or deleted by the user. Unfortunately viruses, spyware, and hijackers often hide there files in this way making it hard to find them and then delete them.
By following the steps below for each version of Windows you will be able to change the operating systems behavior so that you can see hidden and protected files. In this way you will be able to delete or replaces files for troubleshooting purposes.
Windows 95
To enable the viewing of Hidden files follow these steps:
  1. Close all programs so that you are at your desktop.
  2. Double-click on the My Computer icon.
  3. Select the View menu and then click Options.
  4. After the new window appears select the View tab.
  5. Scroll down until you see the Show all files radio button and select it.
  6. Press the OK button and close the My Computer window.
  7. Now your computer is configured to show all hidden files.
Windows 98
To enable the viewing of Hidden files follow these steps:
  1. Close all programs so that you are at your desktop.
  2. Double-click on the My Computer icon.
  3. Select the View menu and then click Folder Options.
  4. After the new window appears select the View tab.
  5. Scroll down until you see the Show all files radio button and select it.
  6. Press the Apply button and then the OK button and close the My Computer window.
  7. Now your computer is configured to show all hidden files.
Windows ME
To enable the viewing of Hidden files follow these steps:
  1. Close all programs so that you are at your desktop.
  2. Double-click on the My Computer icon.
  3. Select the Tools menu and click Folder Options.
  4. After the new window appears select the View tab.
  5. Under the Hidden files and folders section select the radio button labeled Show hidden files and folders.
  6. Remove the checkmark from the checkbox labeled Hide file extensions for known file types.
  7. Remove the checkmark from the checkbox labeled Hide protected operating system files.
  8. Press the Apply button and then the OK button and shutdown My Computer.
  9. Now your computer is configured to show all hidden files.
Windows NT
To enable the viewing of Hidden files follow these steps:
  1. Close all programs so that you are at your desktop.
  2. Double-click on the My Computer icon.
  3. Select the View menu and then click Options.
  4. After the new window appears select the View tab.
  5. Scroll down until you see the Show all files radio button and select it.
  6. Press the OK button and shutdown My Computer.
  7. Now your computer is configured to show all hidden files.
Windows 2000
To enable the viewing of Hidden files follow these steps:
  1. Close all programs so that you are at your desktop.
  2. Double-click on the My Computer icon.
  3. Select the Tools menu and click Folder Options.
  4. After the new window appears select the View tab.
  5. Under the Hidden files and folders section select the radio button labeled Show hidden files and folders.
  6. Remove the checkmark from the checkbox labeled Hide file extensions for known file types.
  7. Remove the checkmark from the checkbox labeled Hide protected operating system files.
  8. Press the Apply button and then the OK button and shutdown My Computer.
  9. Now your computer is configured to show all hidden files.
Windows XP and Windows 2003
To enable the viewing of Hidden files follow these steps:
  1. Close all programs so that you are at your desktop.
  2. Double-click on the My Computer icon.
  3. Select the Tools menu and click Folder Options.
  4. After the new window appears select the View tab.
  5. Put a checkmark in the checkbox labeled Display the contents of system folders.
  6. Under the Hidden files and folders section select the radio button labeled Show hidden files and folders.
  7. Remove the checkmark from the checkbox labeled Hide file extensions for known file types.
  8. Remove the checkmark from the checkbox labeled Hide protected operating system files.
  9. Press the Apply button and then the OK button and shutdown My Computer.
  10. Now your computer is configured to show all hidden files.
Windows Vista
To enable the viewing of Hidden files follow these steps:
  1. Close all programs so that you are at your desktop.
  2. Click on the Start button. This is the small round button with the Windows flag in the lower left corner.
  3. Click on the Control Panel menu option.
  4. When the control panel opens you can either be in Classic View or Control Panel Home view:

    If you are in the Classic View do the following:
    1. Double-click on the Folder Options icon.
    2. Click on the View tab.
    3. Go to step 5.

    If you are in the Control Panel Home view do the following:
    1. Click on the Appearance and Personalization link .
    2. Click on Show Hidden Files or Folders.
    3. Go to step 5.
       
  5. Under the Hidden files and folders section select the radio button labeled Show hidden files and folders.
  6. Remove the checkmark from the checkbox labeled Hide extensions for known file types.
  7. Remove the checkmark from the checkbox labeled Hide protected operating system files.
  8. Press the Apply button and then the OK button.
  9. Now Windows Vista is configured to show all hidden files.
Windows 7
To enable the viewing of Hidden files follow these steps. Please note a guide with images that shows the same steps can be found here:
  1. Close all programs so that you are at your desktop.
  2. Click on the Start button. This is the small round button with the Windows flag in the lower left corner.
  3. Click on the Control Panel menu option.
  4. When the control panel opens click on the Appearance and Personalization link.
  5. Under the Folder Options category, click on Show Hidden Files or Folders.
  6. Under the Hidden files and folders section select the radio button labeled Show hidden files, folders, or drives.
  7. Remove the checkmark from the checkbox labeled Hide extensions for known file types.
  8. Remove the checkmark from the checkbox labeled Hide protected operating system files (Recommended).
  9. Press the Apply button and then the OK button..
  10. Now Windows 7 is configured to show all hidden files.
Windows 8
To enable the viewing of Hidden files follow these steps. Please note a guide with images that shows the same steps can be found here:
  1. From the Windows 8 Start Screen, click on the Control Panel app.
  2. When the Control Panel opens scroll down to the bottom and click on the More Settings option.
  3. The traditional Windows 8 Control Panel will now open. When it is open, click on the Appearance and Personalization link.
  4. Under the Folder Options category, click on Show Hidden Files or Folders.
  5. Under the Hidden files and folders section select the radio button labeled Show hidden files, folders, or drives.
  6. Remove the checkmark from the checkbox labeled Hide extensions for known file types.
  7. Remove the checkmark from the checkbox labeled Hide protected operating system files (Recommended).
  8. Press the Apply button and then the OK button..
  9. Now Windows 8 is configured to show all hidden files.
Please note that you will now see icons that were not previously visible. One of the most common concerns is that you will see a file called desktop.ini throughout your computer. These are legitimate hidden files and can be ignored.
Conclusion
Now that you know how to see all hidden files on your computer, malicious programs such as viruses, spyware, and hijackers will no longer be able to hide their presence from you or people helping you.
 
Thanks & Regards,

"Remember Me When You Raise Your Hand For Dua"
Raheel Ahmed Khan
System Engineer
send2raheel@yahoo.com
send2raheel@engineer.com
sirraheel@gmail.com
send2raheel (skype id)

My Blog Spot
http://raheel-mydreamz.blogspot.com/
http://raheeldreamz.wordpress.com/

My Face book pages
http://www.facebook.com/pages/My-Dreamz-Rebiuld-our-nation
http://www.facebook.com/pages/Beauty-of-islam
http://www.facebook.com/pages/Health-is-wealth

Wednesday, 19 September 2012

How to remove a Trojan, Virus, Worm, or other Malware

Dialers, Trojans, Viruses, and Worms Oh My!
If you use a computer, read the newspaper, or watch the news, you will know about computer viruses or other malware. These are those malicious programs that once they infect your machine will start causing havoc on your computer. What many people do not know is that there are many different types of infections that are categorized in the general category of Malware.
Malware - Malware is programming or files that are developed for the purpose of doing harm. Thus, malware includes computer viruses, worms, Trojan horses, spyware, hijackers, and certain type of adware.
This article will focus on those malware that are considered viruses, trojans, worms, and viruses, though this information can be used to remove the other types of malware as well. We will not go into specific details about any one particular infection, but rather provide a broad overview of how these infections can be removed. For the most part these instructions should allow you to remove a good deal of infections, but there are some that need special steps to be removed and these won't be covered under this tutorial.
Before we continue it is important to understand the generic malware terms that you will be reading about.
Adware - A program that generates pop-ups on your computer or displays advertisements. It is important to note that not all adware programs are necessarily considered malware. There are many legitimate programs that are given for free that display ads in their programs in order to generate revenue. As long as this information is provided up front then they are generally not considered malware.
Backdoor - A program that allows a remote user to execute commands and tasks on your computer without your permission. These types of programs are typically used to launch attacks on other computers, distribute copyrighted software or media, or hack other computers.
Dialler - A program that typically dials a premium rate number that has per minute charges over and above the typical call charge. These calls are with the intent of gaining access to pornographic material.
Hijackers - A program that attempts to hijack certain Internet functions like redirecting your start page to the hijacker's own start page, redirecting search queries to a undesired search engine, or replace search results from popular search engines with their own information.
Spyware - A program that monitors your activity or information on your computer and sends that information to a remote computer without your knowledge.
Trojan - A program that has been designed to appear innocent but has been intentionally designed to cause some malicious activity or to provide a backdoor to your system.
Virus - A program that when run, has the ability to self-replicate by infecting other programs and files on your computer. These programs can have many effects ranging from wiping your hard drive, displaying a joke in a small box, or doing nothing at all except to replicate itself. These types of infections tend to be localized to your computer and not have the ability to spread to another computer on their own. The word virus has incorrectly become a general term that encompasses trojans, worms, and viruses.
Worm - A program that when run, has the ability to spread to other computers on its own using either mass-mailing techniques to email addresses found on your computer or by using the Internet to infect a remote computer using known security holes.

How these infections start
Just like any program, in order for the program to work, it must be started. Malware programs are no different in this respect and must be started in some fashion in order to do what they were designed to do. For the most part these infections run by creating a configuration entry in the Windows Registry in order to make these programs start when your computer starts.
Unfortunately, though, in the Windows operating system there are many different ways to make a program start which can make it difficult for the average computer user to find manually. Luckily for us, though, there are programs that allow us to cut through this confusion and see the various programs that are automatically starting when windows boots. The program we recommend for this, because its free and detailed, is Autoruns from Sysinternals.

When you run this program it will list all the various programs that start when your computer is booted into Windows. For the most part, the majority of these programs are safe and should be left alone unless you know what you are doing or know you do not need them to run at startup.
At this point, you should download Autoruns and try it out. Just run the Autoruns.exe and look at all the programs that start automatically. Don't uncheck or delete anything at this point. Just examine the information to see an overview of the amount of programs that are starting automatically. When you feel comfortable with what you are seeing, move on to the next section.

Use an anti-virus and anti-malware program to remove the infections
Make sure you are using an anti-virus program and that the anti-virus program is updated to use the latest definitions. If you do not currently have an anti-virus installed, you can select one from the following list and use it to scan and clean your computer. The list below includes both free and commercial anti-virus programs, but even the commercial ones typically have a trial period in which you can scan and clean your computer before you have to pay for it.
It is also advised that you install and scan your computer with MalwareBytes' Anti-Malware and SUPERAntiSpyware. Both of these are excellent programs and have a good track record at finding newer infections that the more traditional anti-virus programs miss. Guides on how to install and use these programs can be found below.
How to use Malwarebytes' Anti-Malware to scan and remove malware from your computer
How to use SUPERAntiSpyware to scan and remove malware from your computer
After performing these instructions if you still are infected, you can use the instructions below to manually remove the infection.

How to remove these infections manually
We have finally arrived at the section you came here for. You are most likely reading this tutorial because you are infected with some sort of malware and want to remove it. With this knowledge that you are infected, it is also assumed that you examined the programs running on your computer and found one that does not look right. You did further research by checking that program against our Startup Database or by searching in Google and have learned that it is an infection and you now want to remove it.
If you have identified the particular program that is part of the malware, and you want to remove it, please follow these steps.
  1. Download and extract the Autoruns program by Sysinternals to C:\Autoruns
  2. Reboot into Safe Mode so that the malware is not started when you are doing these steps. Many malware monitor the keys that allow them to start and if they notice they have been removed, will automatically replace that startup key. For this reason booting into safe mode allows us to get past that defense in most cases.
     
  3. Navigate to the C:\Autoruns folder you created in Step 1 and double-click on autoruns.exe.
     
  4. When the program starts, click on the Options menu and enable the following options by clicking on them. This will place a checkmark next to each of these options.
    1. Include empty locations
       
    2. Verify Code Signatures
       
    3. Hide Signed Microsoft Entries
       
  5. Then press the F5 key on your keyboard to refresh the startups list using these new settings.
     
  6. The program shows information about your startup entries in 8 different tabs. For the most part, the filename you are looking for will be found under the Logon or the Services tabs, but you should check all the other tabs to make sure they are not loading elsewhere as well. Click on each tab and look through the list for the filename that you want to remove. The filename will be found under the Image Path column. There may be more than one entry associated with the same file as it is common for malware to create multiple startup entries. It is important to note that many malware programs disguise themselves by using the same filenames as valid Microsoft files. it is therefore important to know exactly which file, and the folder they are in, that you want to remove. You can check our Startup Database for that information or ask for help in our computer help forums.
     
  7. Once you find the entry that is associated with the malware, you want to delete that entry so it will not start again on the next reboot. To do that right click on the entry and select delete. This startup entry will now be removed from the Registry.
     
  8. Now that we made it so it will not start on boot up, you should delete the file using My Computer or Windows Explorer. If you can not see the file, it may be hidden. To allow you to see hidden files you can follow the steps for your operating system found in this tutorial:

    How to see hidden files in Windows
     
  9. When you are finished removing the malware entries from the Registry and deleting the files, reboot into normal mode as you will now be clean from the infection.
How to protect yourself in the future
In order to protect yourself from this happening again it is important that take proper care and precautions when using your computer. Make sure you have updated antivirus and spyware removal software running, all the latest updates to your operating system, a firewall, and only open attachments or click on pop-ups that you know are safe. These precautions can be a tutorial unto itself, and luckily, we have one created already:
Simple and easy ways to keep your computer safe and secure on the Internet
Please read this tutorial and follow the steps listed in order to be safe on the Internet. Other tutorials that are important to read in order to protect your computer are listed below.
Understanding Spyware, Browser Hijackers, and Dialers
Understanding and Using a Firewall
Safely Connecting a Computer to the Internet
Using SpywareBlaster to protect your computer from Spyware, Hijackers, and Malware
Using IE-Spyad to enhance your privacy and Security

Conclusion
Now that you know how to remove a generic malware from your computer, it should help you stay relatively clean from infection. Unfortunately there are a lot of malware that makes it very difficult to remove and these steps will not help you with those particular infections. In situations like that where you need extra help, do not hesitate to ask for help in our computer help forums. We also have a self-help section that contains detailed fixes on some of the more common infections that may be able to help.


 Thanks & Regards,

"Remember Me When You Raise Your Hand For Dua"
Raheel Ahmed Khan
System Engineer
send2raheel@yahoo.com
send2raheel@engineer.com
sirraheel@gmail.com
send2raheel (skype id)

My Blog Spot
http://raheel-mydreamz.blogspot.com/
http://raheeldreamz.wordpress.com/

My Face book pages
http://www.facebook.com/pages/My-Dreamz-Rebiuld-our-nation
http://www.facebook.com/pages/Beauty-of-islam
http://www.facebook.com/pages/Health-is-wealth

How to force quit a program on a Mac

When using an application on a Mac it may become unresponsive and become frozen. When an application is in this state you are normally not able to interact with the program or close it normally via the Quit menu option. When this occurs the only way to close the program is to use Force Quit, which will forcefully close the programs. This tutorial will walk you through terminating an unresponsive program on your Mac.
WARNING: When you forcefully close a program as shown in the steps below, any unsaved data will be lost. You should only close programs this way if the application is hung and you cannot quit it normally.
To forcefully quit a program, please click on the Apple icon (Apple Menu icon) in the top left corner of your MacOS desktop and select Force Quit Finder as shown below.

Apple Menu

This will bring up the Force Quit Applications menu that displays a list of all the running applications that you can close.

Force Quit Applications Menu

Left click on the application you would like to close so that it is selected and then click on the Force Quit button. You will now be shown a prompt confirming whether or not you want to continue terminating the program.

Force Quit Confirmation

Click on the Force Quit button again and the program will be forcefully closed on your Mac.


Thanks & Regards,

"Remember Me When You Raise Your Hand For Dua"
Raheel Ahmed Khan
System Engineer
send2raheel@yahoo.com
send2raheel@engineer.com
sirraheel@gmail.com
send2raheel (skype id)

My Blog Spot
http://raheel-mydreamz.blogspot.com/
http://raheeldreamz.wordpress.com/

My Face book pages
http://www.facebook.com/pages/My-Dreamz-Rebiuld-our-nation
http://www.facebook.com/pages/Beauty-of-islam
http://www.facebook.com/pages/Health-is-wealth
 

How to start Windows in Safe Mode

Introduction
Windows Safe Mode is a way of booting up your Windows operating system in order to run administrative and diagnostic tasks on your installation. When you boot into Safe Mode the operating system only loads the bare minimum of software that is required for the operating system to work. This mode of operating is designed to let you troubleshoot and run diagnostics on your computer. Windows Safe Mode loads a basic video drivers so your programs may look different than normal.
For Win98/ME, XP, Vista and Windows 7 there are two methods of booting into Safe Mode, while 95 and 2000 only have one. We will describe these methods below:
F8 - By pressing the F8 key right when Windows starts, usually right after you hear your computer beep when you reboot it, you will be brought to a menu where you can choose to boot into safe mode. If it does not work on the first try, reboot and try again as you have to be quick when you press it. I have found that during boot up right after the computer shows you all the equipment , memory, etc installed on your computer, if you start lightly tapping the F8 key you will usually be able to get to the desired menu.
System Configuration Utility - You can use the System Configuration Utility, or MSCONFIG, found in Windows 98, ME, XP, Windows Vista, and Windows 7 to make Windows boot into Safe Mode on the next reboot. We will go into specific details in the sections below. Please note, that you should not force your computer to boot into Safe Mode using the System Configuration Utility if you suspect you are infected with malware as the malware may corrupt keys required to boot into Safe Mode. You can read more about this here.
Windows 95
Windows 95 can only boot into Safe Mode using the F8 method as it does not have a System Configuration Utility.
Using the F8 Method:
  1. Restart your computer.
  2. When the machine first starts it will generally list some equipment that is installed in your machine, amount of memory, hard drives installed etc. When it is finished with that it will say "Starting Windows 95". Immediately after seeing "Starting Windows 95" press the F8 key.
  3. You will now be presented with a menu. Select the option for Safe Mode using the arrow keys.
  4. Then press enter on your keyboard to boot into Safe Mode.
  5. Do whatever tasks you require and when you are done reboot to boot back into normal mode.
Windows 98/ME
NOTE: Windows ME may look slightly different than what is shown in the images below. You should still have no problem following along.
Using the F8 Method:
  1. Restart your computer.
  2. When the machine first starts again it will generally list some equipment that is installed in your machine, amount of memory, hard drives installed etc. At this point you should gently tap the F8 key repeatedly until you are presented with a menu.
  3. When you have the menu on the screen. Select the option for Safe Mode using the arrow keys.
  4. Then press enter on your keyboard to boot into Safe Mode.
  5. Do whatever tasks you require and when you are done reboot to boot back into normal mode.
Using the System Configuration Tool Method:
Step 1: Close all programs so that you have nothing open and are at the desktop.
Step 2: Click on the Start button then click on Run.
Step 3: In the Run field type msconfig as shown in the image below.

Figure 1. Starting Msconfig

Step 4: Press the OK button and the System Configuration Utility will start up. You will then see a screen similar to Figure 2 below.


Figure 2. SCU Startup Screen
Step 5: You should now press the Advanced button designated by the red box in the figure above and you will see a screen similar to figure 3 below.


Figure 3. Advanced Options

Step 6: Place a checkmark in the checkbox labeled "Enable Startup Menu" designated by the red box in Figure 3 above. Then press the OK button and then the OK button again. Windows 98/ME will now prompt if you would like to reboot as shown in Figure 4 below.


Figure 4. Confirm Reboot

Step 7: Press the Yes button and your computer will restart into Safe Mode.
Step 8: When the computer boots up perform what diagnostic or troubleshooting tasks you require.
Step 9. When you are finished with these tasks, complete steps 1-7 again, but in Step 6 this time uncheck the checkbox labeled "Enable Startup Menu".
Step 10: Reboot the computer back into normal mode.
Windows 2000
Windows 2000 can only boot into Safe Mode using the F8 method as it does not have a System Configuration Utility.
Using the F8 Method:
  1. Restart your computer.
  2. When the machine first starts again it will generally list some equipment that is installed in your machine, amount of memory, hard drives installed etc. When that is completed it will start loading Windows.
  3. When you see the screen that has a black and white bar at the bottom stating "Starting Windows", tap the F8 key repeatedly until you get to the Windows 2000 Advanced Options Menu
  4. At this menu use the arrow keys to select the Safe Mode option, which is usually the first in the list.
  5. Press the enter key.
  6. Your computer will continue booting, but now will boot into Safe Mode.
  7. Do whatever tasks you require and when you are done reboot to boot back into normal mode.
Windows XP
Using the F8 Method:
  1. Restart your computer.
  2. When the machine first starts again it will generally list some equipment that is installed in your machine, amount of memory, hard drives installed etc. At this point you should gently tap the F8 key repeatedly until you are presented with a Windows XP Advanced Options menu.
  3. Select the option for Safe Mode using the arrow keys.
  4. Then press enter on your keyboard to boot into Safe Mode.
  5. Do whatever tasks you require and when you are done reboot to boot back into normal mode.
Using the System Configuration Tool Method:
Note: If you are having trouble entering Safe Mode via the F8 method, you should not use this method to force it to startup into safe mode. For reasons why, you should read this.
Step 1: Close all programs so that you have nothing open and are at the desktop.
Step 2: Click on the Start button then click on Run.
Step 3: In the Run field type msconfig as shown in the image below.

Figure 4. Starting Msconfig

Step 4: Press the OK button and the System Configuration Utility will start up. You will then see a screen similar to Figure 5 below.


Figure 5. Starting the System Configuration Utility
Step 5: Click on the tab labeled "BOOT.INI" which is designated by the red box in Figure 5 above. You will then be presented with a screen similar to Figure 6 below.


Figure 6. BOOT.INI Tab
Step 6: Put a checkmark in the checkbox labeled "/SAFEBOOT" designated by the red box in Figure 6 above. Then press the OK button. After pressing the button you will be presented with a confirmation box as shown in Figure 7 below.


Figure 7. Confirm Reboot
Step 7: Press the Restart button and let the computer reboot. It will now boot up into Safe Mode.
Step 8: When the computer boots up do what diagnostic or troubleshooting tasks that you need to do.
Step 9. When are finished with your tasks, complete steps 1-7 again, but in Step 6 this time uncheck the checkbox labeled "/SAFEBOOT". Then click on the General tab and set it for Normal startup.
Step 10: Reboot the computer back into normal mode.

Windows Vista
Using the F8 Method:
  1. Restart your computer.
  2. When the computer starts you will see your computer's hardware being listed. When you see this information start to gently tap the F8 key repeatedly until you are presented with the Windows Vista Advanced Boot Options.
  3. Select the Safe Mode option using the arrow keys.
  4. Then press the enter key on your keyboard to boot into Vista Safe Mode.
  5. When Windows starts you will be at a typical logon screen. Logon to your computer and Vista will enter Safe mode.
  6. Do whatever tasks you require, and when you are done, reboot to go back into normal mode.
Using the System Configuration Tool Method:
Note: If you are having trouble entering Safe Mode via the F8 method, you should not use this method to force it to startup into safe mode.
  1. Close any running programs and open Windows so you are back at the desktop.
     
  2. Click on the Start () button.
     
  3. In the Start Menu Search Box () type msconfig and press enter on your keyboard.
     
  4. The System Configuration utility will open and you will see a screen similar to the one below.


    Vista System Configuration Utility
    Figure 8. Vista System Configuration Utility


    Click on the Boot tab.
  5. You will now be at the Boot options screen as shown below.


    Vista Boot tab in the System Configuration utility
    Figure 9. Vista Boot tab in the System Configuration utility


    Put a checkmark in the checkbox labeled Safe boot
     
  6. Press the Apply button and then press the OK button.
     
  7. You will now be presented with a prompt stating that you need to reboot the computer to apply the change.


    Restart Prompt
    Figure 10. Restart Prompt


    Click on the Restart button to reboot your computer.
     
  8. Your computer will now restart directly into Safe Mode. When you get to the Vista logon screen, log on to the computer and perform any necessary tasks.
     
  9. When done with your tasks, from within Safe Mode, start msconfig.
     
  10. When the program is open, and you are on the General tab, select the option labeled Normal Startup.
     
  11. Then press the Apply button and then the OK button.
     
  12. When the programs prompts you to reboot, allow it to do so, and you will boot back into Windows Vista in normal mode.

Windows 7
Using the F8 Method:
  1. Restart your computer.
  2. When the computer starts you will see your computer's hardware being listed. When you see this information start to gently tap the F8 key on your keyboard repeatedly until you are presented with the Windows 7 Advanced Boot Options screen as shown in the image below.


    Figure 11. Windows 7 Advanced Boot Options screen
    Figure 11. Windows 7 Advanced Boot Options screen
  3. Using the arrow keys, select the Safe Mode option you want.
  4. Then press the enter key on your keyboard to boot into Windows 7 Safe Mode.
  5. When Windows starts you will be at a typical logon screen. Logon to your computer and Windows 7 will enter Safe mode.
  6. Do whatever tasks you require, and when you are done, reboot to go back into normal mode.
Using the System Configuration Tool Method:
Note: If you are having trouble entering Safe Mode via the F8 method, you should not use this method to force it to startup into safe mode. For reasons why, you should read this.
  1. Close any running programs and open Windows so you are back at the desktop.
     
  2. Click on the Start () button.
     
  3. In the Start Menu Search Box type msconfig as shown in Figure 12 below.


    Figure 12. Windows 7 Search box
    Figure 12. Windows 7 Search box


    Then press enter on your keyboard.
     
  4. The System Configuration utility will open and you will see a screen similar to the one below.


    Vista System Configuration Utility
    Figure 13. Windows 7 System Configuration Utility


    Click on the Boot tab.
     
  5. You will now be at the Boot screen as shown below.


    Vista Boot tab in the System Configuration utility
    Figure 14. Windows 7 Boot tab in the System Configuration utility


    Put a checkmark in the checkbox labeled Safe boot
     
  6. Press the Apply button and then press the OK button.
     
  7. You will now be presented with a prompt stating that you need to reboot the computer to apply the change.


    Figure 15. Restart Prompt
    Figure 15. Restart Prompt


    Click on the Restart button to reboot your computer.
     
  8. Your computer will now restart directly into Safe Mode. When you get to the Windows 7 logon screen, log on to the computer and perform any necessary tasks.
     
  9. When done with your tasks, from within Safe Mode, start msconfig.
     
  10. When the program is open, and you are on the General tab, select the option labeled Normal Startup.
     
  11. Then press the Apply button and then the OK button.
     
  12. When the programs prompts you to reboot, allow it to do so, and you will boot back into Windows 7 in normal mode.

Problems that can occur by forcing Safe Mode using the System Configuration Utility
It is possible to make your computer continuously boot up into safe mode using the System Configuration utility as described above. The program does this by changing your boot.ini file, the settings file that configures your computer's boot sequence, and adding the /safeboot argument to your operating systems startup line. An example of this can be seen below.

Original [operating systems]
multi(0)disk(0)rdisk(0)partition(2)\WINDOWS="Microsoft Windows XP Professional" /FASTDETECT /NOEXECUTE=OPTIN
After using MsConfig.exe [operating systems]
multi(0)disk(0)rdisk(0)partition(2)\WINDOWS="Microsoft Windows XP Professional" /FASTDETECT /NOEXECUTE=OPTIN /safeboot:minimal
When you are done using safe mode, you would then run the System Configuration utility again and uncheck the /Safeboot option, thus removing the /safeboot argument from the boot.ini file, and allowing your computer to boot up normally.
On a computer that is operating properly this is normally not a problem. Unfortunately, though, a new trick that some of the more recent malware are using is to delete certain Windows Registry keys so that your computer can not properly boot into safe mode. It is in these situations that using the System Configuration utility to boot into safe mode can cause the computer to become inoperable for many users.
This is because once you set the computer to boot into Safe Mode using /Safeboot, it will continuously attempt to start Safe Mode until the /safeboot argument is removed from the boot.ini. Since the malware is not allowing us to actually boot into safe mode, you have no way of getting to a point where you can run the System Configuration utility again to uncheck the /Safeboot option. Thus, you are stuck with a computer constantly attempting to get into safe mode and not being able to do so.
If a situation like this has happened to you it is possible to fix this problem by renaming your boot.ini file. The first step would be to use a boot disk to start your computer. If your computer does not have a floppy disk, then you can typically boot off the Windows CD that came with your computer in order to access the Windows Recovery Console. More information about the Windows Recovery Console can be found here. Once booted to a command prompt, you would simply rename your C:\Boot.ini file to another name like C:\Boot.ini.bak. The command to rename the file at the command prompt is:
ren C:\Boot.ini Boot.ini.bak
Once the file is renamed, you can then remove the boot disk and reboot your computer to get back to normal mode. When booting up after the rename, do not be surprised if you see an error stating that you do not have a valid Boot.ini file. When you get back to normal Windows mode, you can then rename C:\Boot.ini.bak to C:\Boot.ini and run Msconfig again to remove the /safeboot flag.

Conclusion
It is not uncommon when people are helping you troubleshoot your computer that they tell you to enter Safe Mode. With this tutorial you should now know how to enter Safe Mode when it is required.


Thanks & Regards,

"Remember Me When You Raise Your Hand For Dua"
Raheel Ahmed Khan
System Engineer
send2raheel@yahoo.com
send2raheel@engineer.com
sirraheel@gmail.com
send2raheel (skype id)

My Blog Spot
http://raheel-mydreamz.blogspot.com/
http://raheeldreamz.wordpress.com/

My Face book pages
http://www.facebook.com/pages/My-Dreamz-Rebiuld-our-nation
http://www.facebook.com/pages/Beauty-of-islam
http://www.facebook.com/pages/Health-is-wealth 

Sunday, 2 September 2012

How to Fit in to a New Workplace?

Searching for a job and finally getting a desirable one is quite a challenge. But it is certainly not the end of challenges, but the start of new ones. The main aim is to fit in to the office environment and become a vital part of it.
Working in a new environment means meeting new people and adapting to different methods. It could be harder for a middle aged individual as compared to a youngster. But the right attitude could lead you to the desired destiny.
Follow the points to shine.

Be Punctual:
A reputed and seasoned employee can afford to be late now and then (although it is not a good trait), but a new one cant! Reach the office on time because otherwise not only will you lose the precious time but also the reputation! Never make anybody wait for you in the professional scene. It is highly undesirable and can cost you your reputation.

Establish Goals:
Wandering aimlessly never produces pleasing results. Learn what is expected of you. Analyze your first assignment and try to produce the anticipated results in due time. Learn from the people around you and they could help you as well in the hour of need. But be sure that you do not under-perform and do not let the employer believe that he had overestimated you.
The first assignment is practically a test to judge your abilities. It helps the boss decide how able and responsible you are and how much work you can manage on your own. A gold star at the first assignment means that your job is secure.

Be a Perky Person:
Nobody likes to be around a grave and bore person. Rather it is desirable to spend time with the ones who are cheerful and upbeat. It does not mean that you should crack jokes all day around. Just be friendly and likable. Do not be too serious and straight forward. If there is a conversation going on, join the colleagues and give your opinions and hear other people with consideration. It is important that you get to know the people around the workplace for only then you will feel like “the part of the team”. But be careful; don’t overpower the new people in the first few days. Be submissive and respectful.

Culture of the Company:
Appearances do matter! The dress code is an important part of the things that you should know before you start work. To blend in on your first day, observe the dress code and dress accordingly. You certainly would not want to stand out due to your inappropriate clothes. Observe the general air and climate of the new workplace. You might need to adapt and change your habits to fit in.

Ask Freely:
Being in a new boat, no one expects you to know everything. Your colleagues and the boss will be expecting a barrage of questions. They would rather have you asked a hundred questions than aimlessly do your work and end up in a disastrous situation. In the initial stages of your new employment, you will be given the benefit of doubt and all of your questions would be answered. Take advantage of the situation because once settled in the workplace, it would be automatically assumed that you know everything. Ask from the immediate supervisors and the colleagues. Don’t be afraid to ask the boss because everybody knows that no one is born learned!

Learn How the Equipment Works:
Any kind of job requires either a set of hardware or software tools. You might come across the techniques and tools that you have never encountered before in your life. Learn about them as they will help speed up your work. For instance, the new company might be using Coral Draw instead of Adobe Illustrator. Learn the basics so that at least you can start off immediately. Although people are always there to help, internet is the biggest guide and resource nowadays. Look for good tutorials and let it be your virtual tutor!

Be Proactive:
Being a newbie, you will not be burdened with a lot of work. People will automatically assume that you are in the ‘learning phase’. You boss will be trying to get you settled and give you the general feel of the work. However if you think that you are ready to contribute to the new workplace, don’t sit idly staring out of the window but be proactive and ask the people around what would they like you to do? An extra hand is always welcome.

Be Organized:
Being organized saves time and energy and helps in a systemic approach towards work. This does not only apply to the outwardly appearance of your desk but also to the thoughts and ideas in your mind.
An organized desk means that everything is at its place and no time is required to dig up a particular file when asked by the boss. Similarly, organized ideas will help you work in a flow and proper manner and not in a haphazard way.

Build Contacts:
Contacts and Public Relations play an important role in building up a person’s career. Good relations in the office help a lot in producing enviable results. They ensure coordination and understanding and hence better outcomes. An ally at work helps in the tasks, the mood at the office becomes nice and friendly and it becomes easy to work under stressful and tough situations.
Good contacts can help you outside the office as well. They can not only help in flourishing at a job but also in getting new and better ones.

Maintain Your Reputation:
Impressing people early on and then becoming sluggish is certainly not a good idea. Try to live up to the mark and produce consistent results. Hard work in short bursts does not help much, but consistent hard work is something that can take you up the ladder.

Don’t Whine:
Everyone faces issues while adjusting in new environment. Don’t complain to the new coworkers, you don’t know them yet! Discuss the office related issues with family, friends are trusted colleagues but never with the new coworkers for you don’t know that whether they are trustworthy or not! Don’t become too cozy with the gossip queens of the office.

Communicate with the Boss and Provide the Status of Task:
Communicate with your boss regularly. This way you will know that you are on the right track. Ask questions about any confusion or difficulty you might face. Provide the status of your work regularly, in this way any error or miscalculation on your part could be caught in early stages before it becomes fatal.

The Boss-Employee Relationship:
As cited earlier, it is vital to communicate with the boss. Remember, pleasing the boss is utterly important. But what kind of boss do you have? The answer to this question defines your relationship with the boss. Is he deemed as a team member or does he acts as the sole head of the team and is a team honcho?
A team member boss maybe treated casually. The employees could throw ideas and concepts at him without any formality. He could be visited any time without any prior appointment and has a friendly ‘open-door policy’. On the other hand, a honcho is the one who exercises his power as a supreme authority. His office has the dreadful formal air and you can’t just step in without a prior appointment.
Identify your boss “type” and act accordingly!

Don’t Underestimate Yourself:
Being new means that you have a significant number of things to learn but at the same time you have brought with you new perspective and an advantageous experience. These qualities together with hard work can provide remarkable results. But be rational that you have to adapt to the new ways and procedures of the company and not the other way round.
 Being in a new set up seems tough at the start but it is actually a step towards self development, improvement and progress. Openness to new experiences is accompanied with tremendous learning. Take a new job as a challenge and excel at it!

Thanks & Regards,

"Remember Me When You Raise Your Hand For Dua"
Raheel Ahmed Khan
System Engineer
send2raheel@yahoo.com
send2raheel@engineer.com
sirraheel@gmail.com
send2raheel (skype id)

My Blog Spot
http://raheel-mydreamz.blogspot.com/
http://raheeldreamz.wordpress.com/

My Face book pages
http://www.facebook.com/pages/My-Dreamz-Rebiuld-our-nation/176215539101271    @[176215539101271:0]    
http://www.facebook.com/pages/Beauty-of-islam/223983470988333?sk=wall        @[223983470988333:0]               
http://www.facebook.com/pages/Health-is-wealth/289486761065829?sk=wall        @[289486761065829:0]

Thursday, 26 July 2012

How to Shine at an Interview …

Interviews, interviews and interviews…they are the launch of a new job or a career. But most of the times, they are neither uncomplicated nor very pleasing. A job interview is the perfect example when a person faces excitement and pressure at the same time. This strange combination of sentiments can cloud our judgment and tie our tongues.
Perfection is not a man’s trait and many recruitment managers often over look puny interview mistakes. It is, however, important to be prepared to the greatest extent. There are some slip-ups that you can’t afford and there are some ridiculous mistakes that can cast a bad shadow over your abilities and future career.
On the day of your interview, remember to look good and confident and say all the right things. The rest will be fine. Don’t fret and try to think a little before uttering each word.
 How to Avoid a Disastrous Interview
Don’t be late:
Make proper arrangements beforehand to ensure that you reach the designated place on time. Getting up earlier than usual for a single day won’t hurt! Don’t leave your dress un-ironed till the eleventh hour; you never know about electricity!
If something unexpected happens and you can’t avoid being late, whether it be a traffic jam or your alarm clock didn’t beat on time, immediately call ahead and inform them that you will be late. Don’t keep them waiting, they might adjust you at some other time or reschedule the meeting for some other day.
Don’t forget your CV and other important material:
Perfectly dressed to please and accompanied with your work bag, you accidentally left the file containing your impressive resumes, well crafted work samples and portfolios in the kitchen. That is bad but can be managed. You must have the CV and portfolios in your email. Try to get them printed before hitting the office for interview.
Handling a Wardrobe Malfunction:
Nearly everyone has faced some wardrobe malfunctioning before important events and moments. Such circumstances are sometimes beyond our control. One might get splashed by a passing by car on the way to the interview. It is quite possible that your crisp shirt ends up looking idiotic as you reach the office. The best thing to do in such circumstances would be to continue with the interview and at the start of it, explain what happened. Your interviewer would rather like you for your sound experience than loathe to your mud speckled shirt.
Be Prepared and Deliberate:
Do necessary research about the company and the people you are about to encounter. Any misinformation regarding them might suggest careless attitude on your part. You just can’t forget the interviewer’s name but if it skips your mind out of sheer nervousness, try to be smart and look at the nameplate on the desk for a clue or search for certificates or credits that might be adorning the walls. In this way you might get through the situation.
If You are a Young Professional…
If you are a fresh graduate, you are not a seasoned professional with decades of experience on the resume and employers are well aware of this fact. They know that your lack of experience will be compensated by the knowledge you have about the current trends and technology. Be confident about who you are. During the interview, you should emphasize on the fact that how enthusiastic you are about learning from the industry leaders on board.
Things Not to Say During an Interview:
When Asked to Introduce Yourself…
This is one of the trickiest yet interesting questions asked during the interview.
Upon this question, you do not need to ruminate on your life. The interviewer is least interested in your life’s intricate particulars. Don’t blurt out the following details.
  • A brief synopsis about your childhood.
  • How badly you want this job.
  • The details of your unstable marital life.
  • Your religious and political beliefs.
The potential employer certainly is interested in your professional capabilities and not in your personal life. All he wants to make sure is that you can diligently handle the task at hand.
I Hated My Last Boss:
Your last boss was a living misery and the sole purpose of his life was to make the lives of his subordinates miserable. You know this but you potential employers don’t know! Trash talking is a highly frowned upon habit. People do not like back biters in their team. Even if you are rightly speaking, you would not be liked for cursing your boss.
I Don’t Know Anything About the Company:
This is part of the homework that you should be accompanied with while going to an interview. If the interviewer asks why you are interested in this job and you come up with this sort of reply, then it could be easily assumed that all you are after is money and not a career. With today’s swift technology, there is no excuse for this kind of reply except slackness and irresponsible attitude. Google the company’s profile and grab all the important information so that you can justify the reason for your application.
Don’t Talk About Promptness…
Punctuality is a sought after trait. You show up 10 minutes late; most probably it is going to be fine. It is not going to be nice if you suggest afterwards that promptness is your strength. Avoid any such contradictory statements.
Yes, Yes, Yes, No, No!
One word answers are never persuasive. At an interview, it is your task to convince the interviewer that you are the perfect person for the post and you can do a fine job. Even if the question is vague, try hard to answer it in the best possible way. Don’t drone on and on, but avail every chance to prove that you are the person they are hunting for.
Don’t Embellish Your Experience
Don’t go too far on the road of convincing. Be truthful and honest. If you don’t know something the interviewer asks for, fess up and tell him how much you are looking forward to learn the new things. If you brag about qualities you don’t have, chances are that sooner or later the employer will find out. This situation will lead to even worse circumstances; you will certainly not be liked and you might get kicked out!
I’m Going to Need to Take These Days Off:
We all are committed to our personal lives and we all need to fulfill our responsibilities. The potential employer is clearly aware of this fact. Don’t bring up your personal life during the first interview. If you make it to the offer stage, talk about your personal issues and hopes. Talking about your life prior to a job offer will make an impression that either you are self obsessed or too confident that you will get the job.
And Another Thing I Hate…
Don’t scorn in front of a potential employer. Most people want to hear it all sweet and cutesy. Do not present opposing views on subjects that do not matter. It seeds ill feelings and you might get a rejection in the mind of the interviewer. If you don’t agree upon certain things, either say it politely and respectfully or just let it go. After all you want to score this job and have a good working relationship with your boss.
Most Common Interview Blunders:
According to a survey, the following are the errors job seekers make most often:
  • Using cell phone: 77 percent
  • Appearing disinterested: 75 percent
  • Dressing improperly: 72 percent
  • Appearing haughty: 72 percent
  • Talking disapprovingly about current or previous employers: 67 percent
  • Chewing gum: 63 percent
During a job interview, the interviewer seems vicious. Believe me, he does not want to humiliate or mortify you. He just wants to make sure that he does his job flawlessly by choosing the right person for the company. He is certainly not a sadist; his job (recruitment) makes him appear so!


Thanks & Regards,

"Remember Me When You Raise Your Hand For Dua"
Raheel Ahmed Khan
System Engineer
send2raheel@yahoo.com
send2raheel@engineer.com
sirraheel@gmail.com
send2raheel (skype id)

My Blog Spot
http://raheel-mydreamz.blogspot.com/
http://raheeldreamz.wordpress.com/

My Face book pages
http://www.facebook.com/pages/My-Dreamz-Rebiuld-our-nation/176215539101271    @[176215539101271:0]    
http://www.facebook.com/pages/Beauty-of-islam/223983470988333?sk=wall        @[223983470988333:0]               
http://www.facebook.com/pages/Health-is-wealth/289486761065829?sk=wall        @[289486761065829:0]

Tuesday, 24 July 2012

10 predictions for Windows 8, revisited


Back in 2011, I made a series of educated guesses about what we could expect from Windows 8. At the time, there were almost no concrete details available about the new operating system, and I had no inside information. Now that Windows 8 is about to be released, I thought it might be fun to look back at my predictions and see how I did.

1: ARM Support

This one was kind of a gimme. Microsoft had announced that Windows 8 would run on ARM long before I compiled my list of predictions. Technically, however, it isn’t Windows 8 that runs on ARM, but rather a Windows 8 variant called Windows RT.

2: Separation from the server

My second prediction was that Microsoft might have to get away from developing Windows desktop and Windows client in parallel. My reasoning was that the two operating systems were becoming too different, especially with Windows 8 beginning to support ARM processors. Obviously I got this prediction dead wrong. Microsoft designed Windows 8 and Windows Server 2012 as a part of the same development cycle.

3: OS on a diet

For as long as I can remember, people have complained that Windows is an overly bloated operating system. In fact, one of the reasons why Windows Vista never caught on was that it was bloated and ran slowly. My prediction was that Microsoft was going to dramatically reduce the size of the Windows 8 operating system. I based the prediction on the idea that the OS would have to run on PCs, ARM devices (such as tablets and phones), and run from a USB flash drive.
We won’t know for sure how large Windows 8 will be until it is released. But I decided to compare the contents of the Windows folder on a machine running Windows 7 Ultimate against the same folder on a machine running the Windows 8 Release Preview. The Windows 7 machine’s Windows folder consumed 21.25 GB of space. That same folder on a Windows 8 machine consumed 10.94 GB of space.
It is worth noting that Microsoft’s stated system requirements for the Windows 8 release preview are 16 GB (32-bit) or 20 GB (64-bit) of disk space. These are identical to the system requirements for Windows 7.

4: Goodbye to 32-bit support

Pretty much every computer that’s being sold today includes a 64-bit CPU, and this has been the case for quite some time. So I predicted that Windows 8 would not run on 32-bit PCs.
Although I haven’t heard any official confirmation, it seems that Windows 8 will be available in 64-bit and 32-bit editions after all. The public betas have all been available for both 64-bit and 32-bit systems. I have to admit that Microsoft really disappointed me with this one. I thought that we had surely moved past the days of 32-bit computing. On the upside, at least consumers with older systems may still be able to take advantage of the new operating system if they choose.

5: Virtual plugins

My fifth prediction needs a little bit of explaining. I said that Windows 7 was actually a model for Windows 8 in some ways. As you will recall, Microsoft offers something called Windows XP mode in some editions of Windows 7. With Windows XP mode, Windows XP runs as a virtual machine, but in a rather unique way. Users can either use the Windows XP desktop or they can run applications transparently through the Windows 7 desktop, even though those applications are actually running on Windows XP.
My prediction was that Microsoft would use the same model for Windows 8. I thought that instead of providing backward compatibility to legacy operating systems within the Windows a kernel, Microsoft would create virtual instances of legacy operating systems that function as plugins to Windows 8.
Microsoft chose not to design Windows 8 in this way. Instead, it is including Hyper-V in the desktop operating system so that users may use it to run virtual machines.

6: Heavy reliance on the cloud

My sixth prediction was that Windows 8 would be heavily focused on the cloud. After all, over the past couple of years Microsoft has gone all-in with its investment in cloud technology. I predicted that Windows 8 would enable cloud applications appear to users as if they are installed and running locally.
Actually, I feel almost guilty for making this prediction because it was a bit of a no-brainer. It’s also one of the few predictions I got correct. Microsoft is even referring to Windows 8 as a “cloud-enabled OS.”

7: Native support for virtualized apps

My seventh prediction was that Windows 8 would feature native support for sandboxed applications. For example, I predicted that Internet Explorer would run in a sandboxed environment as a way of preventing malicious Web sites from infecting the system.
But rather than designing Internet Explorer to run as a sandboxed virtual application, Microsoft introduced Enhanced Protected Mode and a number of other new security features. One of the big reasons why Microsoft decided not to completely sandbox Internet Explorer was that it wanted to preserve Internet Explorer’s ability to interact with other desktop applications.

8: A bigger distinction between the consumer and the enterprise versions

My eighth prediction was that Microsoft would make the professional version of Windows 8 small and lightweight but would load up the consumer version with lots of extras that aren’t found in the professional version.
In actuality, Microsoft is making a big distinction between the various versions of Windows 8 and Windows RT, but aside from the fact that Windows RT will include Microsoft Office preinstalled, it is the Windows 8 Enterprise Edition that will see the vast majority of the features that aren’t included in other editions. For more details,

9: Hardware to drive software sales

My ninth prediction was that Microsoft would use support for specialized hardware to woo customers back to PC environments. I fully expected Windows 8 to have native support for the Kinect sensor, for example. Even though I seem to have gotten that prediction wrong, one could say that Microsoft has used hardware to drive sales in the form of Microsoft Surface tablets.

10: A new name

My final prediction was that the operating system would not be called Windows 8. Every few years, Microsoft’s marketing team likes to switch things up and rename products, and it just seemed like it was time for Windows to be rebranded. From a PC perspective, I got this prediction wrong. However, the ARM version of Windows 8 was named Windows RT (for Windows Run Time), so I guess I wasn’t completely off base.

Conclusion

I think that the one thing this article proves is that I am not a psychic. By my count, two of my predictions came true, at least four of my predictions were very, very wrong, and the others fell into a grey area somewhere in between.

Thanks & Regards,

"Remember Me When You Raise Your Hand For Dua"
Raheel Ahmed Khan
System Engineer
send2raheel@yahoo.com
send2raheel@engineer.com
sirraheel@gmail.com
send2raheel (skype id)

My Blog Spot
http://raheel-mydreamz.blogspot.com/
http://raheeldreamz.wordpress.com/

My Face book pages
http://www.facebook.com/pages/My-Dreamz-Rebiuld-our-nation/176215539101271    @[176215539101271:0]    
http://www.facebook.com/pages/Beauty-of-islam/223983470988333?sk=wall        @[223983470988333:0]               
http://www.facebook.com/pages/Health-is-wealth/289486761065829?sk=wall        @[289486761065829:0]

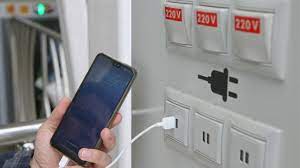
what is Juice Jacking SCAM

  Juice Jacking is a cybersecurity threat that occurs when cybercriminals manipulate public charging stations, such as USB charging ports in...