Sunday, 12 February 2012

Transfer all data from your current Apple iPhone to a new iPhone

Finally, got a new iPhone ! Here is an simple how-to guide on migrating all your data (contacts, SMS, emails, accounts, pictures, music and movies etc.) to the new Apple device.
iPhone To iPhone
Migrating data from one iPhone to another, for this demo purpose we are performing migration from Apple iPhone 4 to Apple iPhone 4S :

  1. Make sure you have the latest version of Apple iTunes installed on your computer.
  2. Backup your original (from where you want data from) iPhone with iTunes.
  3. Now disconnect the older device and connect the other (to which you want data migrated to) to your computer and iTunes.
  4. Right-click the device in iTunes and select "Restore from backup...".
  5. Restore iPhone
  6. Now select the latest backup done in step 2 above and continue.
  7. Select restore point
  8. Your device will now start restoring backed-up data from older phone, let the process complete.
  9. iPhone restore progress
    restore of data
  10. Your device should restart once to complete the process.
  11. iPhone restart
  12. Once rebooted and restore completed, you will be shown the screen as below - simply follow the on-screen instructions and complete the process.
  13. iPhone data restore completed 


     Thanks & regards, "Remember Me When You Raise Your Hand For Dua" Raheel Ahmed Khan System Engineer send2raheel@yahoo.com send2raheel@engineer.com sirraheel@gmail.com send2raheel (skype id) My Blog Spot http://raheel-mydreamz.blogspot.com/ http://raheeldreamz.wordpress.com/ My Face book pages http://www.facebook.com/pages/My-Dreamz-Rebiuld-our-nation/176215539101271    http://www.facebook.com/pages/Beauty-of-islam/223983470988333?sk=wall                http://www.facebook.com/pages/Health-is-wealth/289486761065829?sk=wall

Friday, 10 February 2012

Google Desktop


Google Desktop is desktop search software made by Google for Linux, Mac OS X, and Microsoft Windows. The program allows text searches of a user's e-mails, computer files, music, photos, chats, Web pages viewed, and other "Google Gadgets".
In September 2011, Google announced it would discontinue a number of its products, including Google Desktop.

Features
As of January 2008, Google Desktop features the following functionality:

File indexing
After initially installing Google Desktop, the software completes an indexing of all the files in the computer. After the initial indexing is completed, the software continues to index files as needed. Users can start searching for files immediately after installing the program. After performing searches, results can also be returned in a web browser on the Google Desktop Home Page much like the results for Google Web searches.
Google Desktop can index several different types of data, including email, web browsing history from Internet Explorer, Google Chrome and Mozilla Firefox, office documents in the Open Document and Microsoft Office formats, instant messenger transcripts from AOL, Google, MSN, Skype, Tencent QQ, and several multimedia file types. Additional file types can be indexed through the use of plug-ins Google Desktop allows the user to control which types of data are indexed by the program.
Google Desktop only indexes 100,000 files per drive during the initial indexing period. If users have more than 100,000 files in a particular drive, Google Desktop won't index all of them during this initial period. However, Google Desktop adds files to the index during real-time indexing when users move or open them.

Sidebar

A prominent feature of Google Desktop is the Sidebar, which holds several common Gadgets and resides off to one side of the desktop. The Sidebar is available with the Microsoft Windows and Linux versions of Google Desktop. The Sidebar comes pre-installed with the following gadgets:
  • Email – a panel which lets one view their own Gmail messages.
  • Scratch Pad – here the user can store notes; they are saved automatically
  • Photos – displays a slideshow of photos from the "My Pictures" folder (address can be changed)
  • News – shows the latest headlines from Google News, and how long ago they were written. The News panel is personalized depending on the type of news you read.
  • Weather – shows the current weather for a location specified by the user.
  • Web Clips – shows updated content from RSS and Atom web feeds.
  • Google Talk – If Google Talk is installed, double clicking the window title will dock it to the user’s sidebar.
Like the Windows Taskbar, the Google Desktop sidebar can be set to Auto-Hide mode, where it will only appear once the user moves the mouse cursor towards the side where it resides. If not on auto-hide, by default the sidebar will always take up about 1/6 – 1/9 of the screen (depending on the screen resolution), and other windows are forced to resize. However, the sidebar can be resized to take less space, and users can disable the "always on top" feature in the options. With the auto-hide feature on, the sidebar temporarily overlaps maximized windows.
Another feature that comes with the Sidebar is alerts. When the Sidebar is minimized, new e-mail and news can be displayed on a pop-up window above the Windows Taskbar.

Quick Find

When searching in the sidebar, deskbar or floating deskbar, Google Desktop displays a "Quick Find" window. This window is filled with 6 (by default) of the most relevant results from the user's computer. These results update as the user types, and allows use without having to open another browser window.

Deskbars
Deskbars are boxes which enable searching directly from the desktop. Web results will open in a browser window and selected computer results will be displayed in the "Quick Find" box (see above). A Deskbar can either be a fixed deskbar, which sits in the Windows Taskbar, or a Floating Deskbar, which may be positioned anywhere on the desktop.

Email indexing
Google Desktop includes plugins that allow indexing and searching the contents of local Microsoft Outlook, IBM Lotus Notes, and Mozilla Thunderbird email databases, outside of the client applications' built-in search functions. For Lotus Notes, only local databases are indexed for searching. Google Desktop's email indexing feature is also integrated with Google's web-based email service, Gmail; it can index and search the email messages in Gmail accounts.

Gadgets and plug-ins

Desktop gadgets are interactive mini-applications that can be placed anywhere on the user's desktop – or docked in the Sidebar – to show new email, weather, photos, and personalized news. Google offers a gallery of pre-built gadgets for download on the official website. For developers, Google offers an SDK and an official blog for anyone who wants to write gadgets or plug-ins for Google Desktop. An automated system creates a developer hierarchy called the "Google Desktop Hall of Fame", where programmers can advance based on their gadgets' number and popularity.
The SDK also allows third-party applications to make use of the search facilities provided by Google Desktop Search. For example, the file manager Directory Opus offers integrated Google Desktop Search support.


Results list: title meta data

Even though other desktop search programs can search files meta data, Google Desktop (for Windows) is the only one that uses the "title" tag for its results lists of all files (On Linux it shows the meta-data of HTML files, but not PDF files). Other programs use the file names for their results lists. The use of the "title" tag gives a significantly better user experience, since metadata titles (when present) are written in ordinary language, while file names are less communicative. When the title meta data is missing from a file, Google Desktop reverts back to use its filename.

Release history

Google Desktop running on Mac OS X.
Google Desktop running on Red Hat Linux.
Google Desktop was originally developed to bring Google search technology to the desktop. Google Desktop received much attention because it may allow reverse engineering of Google's proprietary search algorithm.
A centrally administered version, which integrates the user experience with the vendor's appliance, exists as well. Google Desktop was officially discontinued on September 14, 2011.

Microsoft Windows
  • The first release of Google Desktop Search was released as a beta version on October 14, 2004.
  • Version 2 was released as a beta version on August 22, 2005. The new feature that distinguishes Desktop 2 from Desktop is the addition of Sidebar, a panel that displays personalized information, which can be placed on either side of the Windows desktop and can display real-time news, e-mail, photos, stocks, and weather, among others. Sidebar includes a search box that can search just the PC or Google's other search types (like Web, Images, News, Groups.) Google Desktop 2 graduated from beta on November 3, 2005. New features include a sidebar plug-in for Google Maps and more plug-in developer support.
  • Google Desktop 3 Beta was released on February 9, 2006. It includes support for searching multiple computers on a network. Google Desktop 3 graduated from beta on March 14, 2006. Notable in this version is the quick search box, which appears anywhere on your desktop after pressing "control" twice.
  • Google Desktop 4 Beta was released on May 10, 2006. It features Google Gadgets, modules that can deliver an array of information. It also introduces option to automatically remove deleted files from search results. Google Desktop 4 graduated from beta on June 27, 2006.
  • Google Desktop v4.5 was released on November 14, 2006, adding a transparency aesthetic to the sidebar and "floating" gadgets. The graphic interface of the sidebar was also enhanced with more stylized icons for news, stocks, weather, photos, etc. Release 4.5 also added support for Windows Vista.
  • Google Desktop 5 Beta was released on March 6, 2007.
  • Google Desktop v 5.1 (the first post-Desktop 5 Beta release) is made available for download on April 27, 2007.
  • Google Desktop v 5.5 was released on October 2, 2007.
  • Google Desktop v 5.5 (5.7.0802.22438) was released February 29, 2008.
  • Google Desktop v 5.5 (5.8.0806.18441) was released July 1, 2008.
  • Google Desktop v 5.8 (5.8.0809.08522) was released September 11, 2008.
  • Google Desktop v 5.8 (5.8.0809.23506) was released October 5, 2008.
  • Google Desktop v 5.9 (5.9.0906.04286) was released July 8, 2009. It added support for the Chrome browser and is the last version mentioned in the release notes.
  • Google Desktop v 5.9.0909.02235 added support for the Private Browsing features of Firefox 3 and Internet Explorer 8.
  • Google Desktop v 5.9.0909.30391 has been released.
  • Google Desktop v 5.9.0911.03589 has been released.
  • Google Desktop v 5.9.1005.12335 was released in May 2010.
Mac
On April 2007, Google released Desktop 1.0 for Mac OS X, which can function alongside the Spotlight search tool in Mac OS X v10.4.
On November 29, 2007, Google released Desktop v1.4.0.826 beta for Mac OS X, which plugs into Dashboard for Gadgets support.
Version 1.6 of the Mac version of Google Desktop does not function under Snow Leopard. As of June, 2011, Google is yet to release an update for Snow Leopard support.

Linux
Google released Desktop 1.0 for Linux on June 27, 2007. It currently features the basic functionality of the Windows version and the sidebar functionality.
Google added 64-bit support to the Google Desktop for Linux with version 1.1.1.0075, which was made available for download on December 18, 2007.
Google Desktop for Linux version 1.2.0.0088 was released on April 11, 2008.

Criticisms

Security
In February 2007, Yair Amit, of Watchfire, found a series of vulnerabilities[17] in Google Desktop that could allow a malicious individual to achieve not only remote, persistent access to sensitive data, but in some cases full system control as well. The significant impact and the ease of exploitation forced Google to change some of Google Desktop's logic in Google Desktop version 5.

Privacy
Many privacy and civil liberties groups such as the Electronic Frontier Foundation (EFF) have concerns that personal information on people's computers could readily be copied from users' hard drives.
Google Desktop version 3 contains certain features that raise serious security and privacy concerns. Specifically, the share across computers feature that introduces the ability to search content from desktop to desktop greatly increases the risk to users' privacy. If Google Desktop V.3 is set to allow Search Across Computers, files on an indexed computer are copied to Google's servers. The potential for information stored on their computers to be accessed by others if they enable this feature of Google Desktop v. 3 on their computers should be seriously considered. The EFF advises against using this feature. Also, those who have confidential data on their work or home computers should not enable this feature. There are privacy laws and company policies that could be violated through the installation of this feature, specifically, SB 1386, HIPAA, FERPA, GLBA and Sarbanes-Oxley.
Other more far reaching concerns arise around the packaging and end user license agreement – specifically the level of intrusion on the local machine and the disclaimers that users implicitly agree to future changes in the license agreement without actually being able to see them immediately.

Outlook indexing
There had been some issues with Microsoft Outlook indexing. Deleted email listings were not removed and required re-installing Google Desktop for any new archived mail to be listed. Several versions have been released to patch the Outlook indexing.
During the first half of 2009, a large number of Google Desktop users reported that the product stopped indexing suddenly, when the index file reached approximately 4GB in size. A full uninstall (including manually deleting the indexes) and then reinstall would fix the problem temporarily, but the problem would recur when the index file reached 4GB again. The problem has been resolved as of Google Desktop Search version 5.9. Currently, Google Desktop does not index email or contacts in Outlook 2010.

 Thanks & regards,

"Remember Me When You Raise Your Hand For Dua"
Raheel Ahmed Khan
System Engineer
send2raheel@yahoo.com
send2raheel@engineer.com
sirraheel@gmail.com
send2raheel (skype id)

My Blog Spot
http://raheel-mydreamz.blogspot.com/
http://raheeldreamz.wordpress.com/

My Face book pages
http://www.facebook.com/pages/My-Dreamz-Rebiuld-our-nation/176215539101271  
http://www.facebook.com/pages/Beauty-of-islam/223983470988333?sk=wall              
http://www.facebook.com/pages/Health-is-wealth/289486761065829?sk=wall

Thursday, 9 February 2012

How to Install Mac OS X on a PC (Without Using a Mac)


Using a Mac to install Mac OS X Snow Leopard on a PC. 
Unfortunately, you may be unable to follow such tutorials if you do not readily have access to a Mac to perform the preparation necessary for the installation.
Great progress has been made in hacking PCs to run OS X, and it is now possible to install Mac OS X without a Mac. Thanks to some great tools put together by some brilliant hackers, it is also much easier and does not involve nearly as much time and effort as was once required.

Step 1: Getting The Hardware Ready

I recently purchased the following set of hardware for the purposes of building a Hackintosh (often PCs running Mac OS X are referred to as such):
The motherboard has an 8-pin power connector on it, and although it is possible to connect a single 4-pin connector to it, you may encounter odd issues running with just a single 4-pin connector. To ensure that you provide sufficient power to the board, you should purchase the 4-pin to 8-pin power adapter. Alternatively, you could purchase a power supply with 3x 4-pin connectors (1 for the 20+4-pin main connector, and 2 for the 8-pin connection) or an 8-pin connector.


I did not purchase a hard drive or video card, as I used some I already had from another PC, but you will need those items as well. As of the time this article was written, you can get a 1TB drive shipped for $75 and an NVIDIA GeForce 9500 GT video card for $65.
I also purchased v10.6.3 of OS X Snow Leopard retail DVD for a mere $29 (was about $35 with shipping & handling).
All-in-all, the full system (without monitor) will run you around $600 (you could also add a 22″ monitor for $170). You could certainly try doing it even cheaper with different hardware, but you’ll need to figure out the appropriate changes to make in the BIOS and boot loader installation.
I did my best to put together a fairly modern system for a very reasonable price. Having used this set of hardware, I can affirm that it runs OS X Snow Leopard very well. Without a doubt, $600 – $800 is a far cry from what you would spend on an equivalent Mac from Apple. Granted it won’t be as compact or pretty as an iMac, but it will be just as functional.

Step 2: Putting The Hardware Together

If you purchase the hardware I used, along with a hard drive and NVIDIA GeForce video card, you should be able to follow the instructions exactly as I’ve laid them out. If you’ve never built a PC before but are willing to give it a try, you’ll definitely want to check out The Idiot’s Ultimate Guide to Build Your Own PC. It is a step-by-step guide to building your own PC, with plenty of photos to help you out.
You can try following this tutorial with existing hardware you have as well, although you may need to make adjustments when configuring the BIOS and installing the boot loader. The more modern your hardware is, the better the chances are it will work for you. It would be best if you have a 64-bit Intel dual-core (or quad-core) processor, although an older CPU might still work as well. I would recommend NVIDIA GeForce video card, but ATI cards should work too.

Step 3: Prepare The Boot Disk

In addition to the hardware and a retail copy of Mac OS X Snow Leopard, you’ll also need a blank CD. You may want to use a rewritable CD if you’re using a different hardware configuration, just in case the first one I recommend doesn’t work for you. There are two boot disk images that will allow you to install OS X directly from the installation DVD:
I successfully used both of them with my hardware setup. However I recommend you try iBoot first, as it is a bit leaner and doesn’t take as long to boot. If you’re using my hardware configuration, be sure to download the iBoot Supported disk image. If you use Empire EFI, download the Empire EFI v1.085 R2 image.
You can use one of many free programs to burn CDs if you don’t have one. Be sure to use the disk image burning mode in your CD burning software. Do not just simply copy the disk image file to a blank CD. I like InfraRecorder, because it makes this very easy. All you have to do is click the Write Image button, select the image, and burn it. Once again, you may wish to use rewritable media if you’re using a different hardware configuration than mine.

Step 4: Bios Configuration

Fortunately, the Gigabyte GA-H55M-USB3 does not require a lot of configuration to run Mac OS X. When you first turn on or reboot the machine, press the delete key to enter the BIOS setup. You can just load the Optimized Defaults, and just make a few changes within three sections of the bios: Advanced BIOS Features, Integrated Peripherals, and Power Management Setup.
4.1 – First, go to Advanced BIOS Features and set the First Boot Device to CDROM. I have my USB drive as the second drive and then Hard Disk as third – you can configure yours the same way if you wish to ever boot from a USB drive. Just be sure that Hard Disk is the Second Boot Device or Third Boot Device.
4.2 – Next, configure SATA to run in AHCI mode in the Integrated Peripherals menu. You’ll need to set both PCH SATA Control Mode and Onboard SATA/IDE Ctrl Mode to AHCI.
4.3 – Finally, go to Power Management Setup and set the HPET Mode to 64-bit mode.

Step 5: Installing Mac OS X

5.1 – Insert the iBoot (or Empire EFI) boot disk.
5.2 – When you see screen below, eject the disk.
5.3 – Insert the Retail Mac OS X Snow Leopard DVD, wait a few seconds, and press F5.
5.4 – When you see the screen below, select Mac OS X Install DVD (it should already be selected) and press Enter.
5.5 – If all goes well, you should eventually see the language selection screen for the installer. If all did not go well and you do not make it to the language selection screen, try downloading a different version of iBoot or Empire EFI.
5.6 – Select your language and click the arrow to proceed.
5.7 – Next, you need to partition your drive. Click on Utilities > Disk Utility.
5.8 – Select your disk drive.
5.9 – Click Partition.
5.10 – Select 1 Partition for the partition scheme. Note: If you have a drive that is larger than 2 TB, do not create partitions larger than 1 TB. Split the drive into multiple partitions, and be sure the main installation partition is 1 TB or smaller.
5.11 – Enter a name for the partition (I used Hackintosh).
5.12Select Mac OS Extended (Journaled) as the Format.
5.13 – Click Options…, select GUID Partition Table, and then click OK.
5.14 – Click Apply.
5.15 – Quit Disk Utility and proceed with the installation. Install on the Hackintosh partition.

Step 6: Installing the Boot Loader

Do not fret when you reboot after the installation and get a boot error, as you will need to first boot the machine with iBoot (or Empire EFI). Eject the Mac OS X Snow Leopard install DVD, put your boot CD back into the drive, and reboot the machine. Now when you boot up, you should see a second choice for your installation partition (Hackintosh if you named it that way). Select the Hackintosh partition and press Enter to boot into OS X.
Once you’ve completed the first-run setup, open up Safari and download Multibeast. Multibeast is another superb tool by tonymacx86 and MacMan that makes it stupid easy to install the boot loader, along with all the drivers necessary for your Hackintosh to function properly.
In addition to downloading Multibeast, you will need to download the DSDT for the Gigabyte GA-H55M-USB3 and copy it to the desktop. Be sure to save it as
DSDT.aml
. Launch Multibeast and make the following selections (your choices will differ if you have a different motherboard/hardware configuration):
  • UserDSDT
  • System Utilities
  • Advanced Options > Kexts > Audio > LegacyHDA > ALC889
  • Advanced Options > Kexts > Graphics > NVEnabler
  • Advanced Options > Kexts > Network > RealtekR1000SL
  • Advanced Options > Patched Kernels > 10.3.1 Supported Kernel
After MultiBeast finishes installing, eject the iBoot CD and reboot the system. You should be able to boot right up from the hard drive, and all your devices should work just fine.

Step 7: Getting Started with Your New Mac

So what now? Most certainly you’ll want to check out 5 apps to get more out of your new Mac as well as 15 must-have apps for your Mac. In fact, you should probably just go ahead and browse the entire Mac section on MakeUseOf, as you’ll find a wealth of great free stuff for your new Mac in there. And most importantly make sure to download MakeUseOf’s getting started manual for Mac. Highly recommended for switchers.
If ever you encounter into problems with your new Mac, you can always seek help from MakeUseOf Answers.
If you have any problems installing Mac OS X on your PC, just post a comment right here and we’ll do what we can to help. Just be sure to provide as much information about the hardware you’re using:
  • Motherboard make and model (i.e. Gigabyte GA-H55M-USB3)
  • CPU model (i.e. Intel Core i3-530 )
  • GPU model (i.e. NVIDIA GeForce 9900 GT)
I never managed to get sleep to work. When I try to put the computer to sleep, it sort of goes into a coma. The fans never shut down and the machine doesn’t wake up when you press the power button. If you manage to get sleep to work with my hardware configuration, please do feel free to share your solution in the comments on this article.
There are also many great forums and sites out there that provide a lot of information and assistance with running Mac OS X on PC. Here are just a few you may want to check out:
If you do seek assistance from any of these or similar resources, be sure to search for your problem before posting it. You will be flamed to no end if you ask a question that has already been answered. Another tip for posting in these forums: never call it a MAC (in all caps) instead of a Mac, or you will solicit many abusive responses. Mac is an abbreviation not an acronym.
Here are a few more links that provide tools and files to help you set up a Hackintosh on hardware other than what I’ve mentioned here:
  • myHack – Another bootloader/kext installer, similar to Multibeast
  • Kexts.com – A good resource for downloading Kexts (device drivers)
  • Kext Helper – A tool that makes it easy to install new Kexts
  • Kext Utility – A tool to ensure proper kext installation
  • Chamelon Boot Loader – The boot loader that pretty much all the boot disks out there use (including iBoot and Empire EFI).
  • netkas PC EFI – Used in combination with Chameleon to provide maximum compatibility for booting OS X. Most boot disks use this as well.
  • BootCDMaker (French) – Utility (for Mac) to create your own custom boot disks
A million thanks to tonymacx86 and MacMan for developing iBoot and Multibeast to make installing Mac OS X Snow Leopard on PC a piece of cake. Enjoy your new Hackintosh and let us know what you think of it!
Disclosure Statement: Please note that the links to the hardware in this article are affiliate links. MakeUseOf will earn a small commission on any purchases you make. Commissions earned will support the staff of MakeUseOf and allow us to continue to bringing you more great articles.
Disclaimer: Please note that running Mac OS X Snow Leopard on hardware other than a Macintosh is against the Mac OS X End User License Agreement (EULA). If you have concerns about this, you may wish to read Is Making Your Own Hackintosh Legal? By installing Mac OS X you are in breach of a contract (breaking a contract is not the same as breaking the law). As long as you own a legal copy of the software, you are not in violation of copyright law.


Thanks & regards,

"Remember Me When You Raise Your Hand For Dua"
Raheel Ahmed Khan
System Engineer
send2raheel@yahoo.com
send2raheel@engineer.com
sirraheel@gmail.com
send2raheel (skype id)

My Blog Spot
http://raheel-mydreamz.blogspot.com/
http://raheeldreamz.wordpress.com/

My Face book pages
http://www.facebook.com/pages/My-Dreamz-Rebiuld-our-nation/176215539101271   
http://www.facebook.com/pages/Beauty-of-islam/223983470988333?sk=wall               
http://www.facebook.com/pages/Health-is-wealth/289486761065829?sk=wall
 

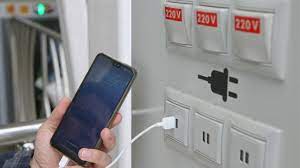
what is Juice Jacking SCAM

  Juice Jacking is a cybersecurity threat that occurs when cybercriminals manipulate public charging stations, such as USB charging ports in...